
Hello everyone!
Some weeks ago I wrote about the teddy elephant and an elephant rattle, the drawstring backpack and the name banner I made for one of my friends’ new born son.
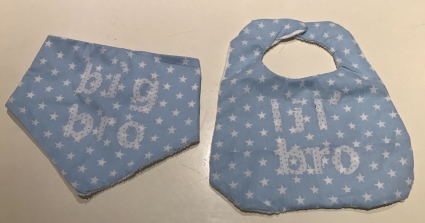
Today I will show you two other presents that I made for their two kids (their furry son and their baby boy). I know how important their dog Charlie is for them, so I decided to make them matching bib and bandana.
On the bandana I put the letters “big bro” and on the bib “lil’ bro”. I used the font Lucida Grande in bold, size 140pt.
I used:
- the different patterned fabrics (I used the same as for the other projects)
- waterproof terry cloth
- velcro
- fabric glue
Baby bib
For the baby bib I used a pattern from the webpage Craftaholics Anonymous, even though I didn’t put the pocket as the letters wouldn’t have fit otherwise.
To make this baby bib you have to:
- Print the pattern and cut the pieces (I didn’t cut the pocket one as I didn’t use it). I cut the front pieces from the stars pattern and the back one from the waterproof terry cloth.
- Sew the different parts together.
- Print the letters, cut them (I used the spotted pattern) and glue them on the bib.
- Put some glue around the letters so that they won’t fray.
- Glue two velcro at the edges.
This is how Fredrik’s bib looks like:


Dog bandana
I used the same materials for the dog bandana.
If you want to make this bandana you have to:
- Cut one triangle in a patterned fabric (I used the stars one) and one in waterproof terry cloth. The long side of my triangles was 40cm and the short ones 30cm (it’s 21cm high).
- Sew the two pieces together, the two nice sides facing each other.
- Turn it around, and close it.
- Cut the letters and glue them as in the bib.
Charlie’s bandana looks like this:


Do you like these two projects?
Marta ♥

